Monday, December 14, 2009

A completely different era - Part Four - End of the line

I'm sorry guys I didn't mean to leave you with a cliffhanger like this. I did finish the outfit in time and wore it with great pride, felt fabulous and had such a lovely night out that I completely forgot to get pictures taken of me in all my splendor.

I planned to dress up four you guys last week but an urinal tract infection made me feel in no mode for fancy dress up. I'm still battling this beast and as soon as I conquered it I will dress up, put on the same make up and fix my hair so you can see what I looked like that fantastic night. I might get dear M to dress up four you to but I cant promise that for sure ;)

The corset it self turned out to big, again. M managed to lace it completely shut all the way in the back. I spent most of last Sunday pondering how a 28" corset could close on me...then I compared the shape of my 28" vollers and the corset I made. And it hit me. The vollers has a very straight shape while the 1880's corset is curved. The later makes it possible for my bust and hips to expand while my waist gets compressed. Apparently there are no limit to how much I can lace my waist as long as my bust and hips are allowed to expand...

I also discovered that the stiff steel bones only work at CF and CB on this type of corset. I had put some at the side fronts and side backs and it was not comfortable at all. So I will change those bones to spring steel and then sell this corset for half my regular price since it has been worn twice.

And I will pray that the last changes I made has rendered my pattern to perfection this time :)

Anyway, here are the last two days of sewing madness for this project:

Friday the 4th of December
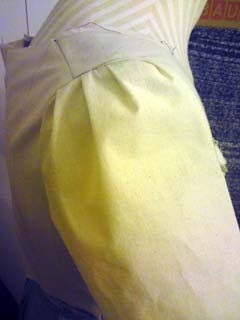
07:45 Starts to assembly the fascinator with the hot glue gun


(It's almost finished on this picture it's only the bias edge missing and the comb that keeps it to my head.)

08:11 Starts to finish the CB's of the corset

08:34 The CB's are finished and I start with the bottom edge


09:33 Bottom finished and the hard steels gets pushed in to their channels
When that's done I went inside the main house and got my self ready for goin to Stockholm. I spent most of the day and evening there, shopping, going to a shop called Pom Pom Parlour and introducing myself and my sewing business (and hoping that they will like my stuff and wants to sell it) and I spent the rest of the afternoon and the evening drinking tea and chatting with Isis :)

Saturday the 5th of december
09:55 Starts finishing the top edge

10:41 Starts setting grommets

11:12 The grommets are in and the corset is finished!


Cut out a lining for the fascination and a strip of fashion fabric to make a bow out of
Goes inside the main hose and sew a comb on the lining, glue the lining on and edge the hole shebang with hot glue and bias binding. The fascinator is finished!

Then me and M goes to Uppsala for some Christmas shopping. We arrive at home base at approximately 16:30. Then I start to sew the bows and bells to my skirt. When that's done my outfit is done 2 hours before planned departure to the party!

Now M realizes that he needs a cravat for his outfit (He wore this smoking jacket, a fez, black shirt, suspenders and black dress slacks). I dig through the fabric stash and find the left overs from his jacket that I originally planned to make the corset out of and some matching lining fabric. Whips up a pattern for the cravat, cut it out stitch it together and turn it. Do a quick try on M to see that it looks like it should. I does. Great. We hurry inside and I fix my make up, my hair and M laces me in to the corset. While we drive to Stockholm I finish the last on the cravat by hand in the car...

/L

Thursday, December 3, 2009

A completely different era - Part Three- Making nice progress

Todays madness:

06:30 The bell rings. Time to get up and eat breakfast

07:30 Starts to cut and insert the spring steel boning. When that's finished I cut and file down the edges of the hard steel.

10:07 All I can do is done. Time to go inside and freshen up for the meeting with the great girl that takes care of my horrible economy papers. (I'm suffering from dyscalculia, it makes me very bad at handle big amounts of numbers.)

10:53 Miss the buss to Uppsala. Goes inside and try to get more of my papers ready.

11:53 Catches the bus to Uppsala.
Do the horrible papers, discover that I've probably misplaced some of them and then enter the fun part of the day - shopping. I found some black ostrich feathers at Panduro ( a craft store chain), some gorgeous red metallic net and black bias at a store called "Tyg Centrum" (= Fabric Central"). If you go to Uppsala, go there. It is a small store but there are fabric stacked from the floor up to the ceiling. And the girl who owns the place are really nice. The prices are a bit high on some fabrics though, but I go there anyway.

17:00 Arrive at home. Take some chicken out of the freezer and while it tawns I cover my fascinator base with the fashion fabric. I also make a gathered fan shape out of some of the net. My plan is to attach it to the base with my hot glue gun tomorrow, add the shortened feathers and crown the whole glory with a bow made of a pinked strip of the fashion fabric.

My fascinator, so far:


I haven't decided yet what side to have as front. My first plan was to have the point as front but now I think it might look cool to have the point as top?

When the covering was done I put the chicken in the pan and while it cooked I covered the tips of my hard steel bones with electrical tape. It's not my favorite solution but I couldn't find anything suitable to coat them with in Uppsala.

This is what I have left to do:
Finish the CB's on the corset with black bias
Insert the hard steel bones in the corset
Close the edges with black bias
Make and attach 4 bows to the skirt and glue one to a pin for the corset
Attach four bells to the skirt and one to the pin
Assembly the fascinator

I need to buy:
One pair of seamed fishnet stockings
A metallic comb for fastening my fascinator to my hair

I'll end this with the words of fantastic M, my fiance:
- Skall du ha ett löv på huvet? (= Are you going to wear a leaf on your head?)

He said it with a tone that made me feel like I was planning something very indecent ;)

/L

Wednesday, December 2, 2009

A completely different era -Part 2- More sewing madness

I'm quite accomplished with todays achievements. The vision has under gone some tweaks but it is only to the better and less time consuming. This was my sewing madness today:

06:15 For whom the bell tolls..time to get up, try to awaken and get some nourishment into the system. Reads Cut of womens clothing and Patterns of Fashion 1 during breakfast.

07:15 Starts cutting the foundation layers and marking boning channels

08:35 Starts to assembly the corset
10:19 Time to start working on the Steam punk coat since my official work hours has started. Pins the assembled pieces to Vermont.

Don't like the skirt, at all. Too much red.Rips it off. Pins some "bows" made of scraps on underskirt.

Ahhh, much better! And all I have to do skirt wise now is to make proper bows!

12:00 - 13:00 Lunch break
While the food gets warm in the oven I start to stiffen a fascinator base with glue.


I plan to have BIG hair on Saturday and then my all black hat will disappear in the blackness of my hair. So a fascinator it will be. I will cover the base with the same fabric as the corset and edge it with black bias just as the corset. I'm not sure what to embellish it with yet, I will take a hike to the big craft store in Sthlm on friday and see what they can offer. A black feather and some gold net would be nifty.

The fascinator base is made of two layers of heavy canvas stiffened with two or three layers of wood glue. I like to work with wood glue, it is easy to find, gets very stiff and since it's water soluable before it's dry it is easy to clean up any mess ;)

During food warming I also manage to stitch one more panel to the corset and cut some ribbons of the fashion fabric with my pinking scissors.

17:19 After 4+ hours of fiddling with the lining of the steampunk coat, I had enough. I don't do modern lined clothing very often so I tend to forget how to do it between the times :/ I find it erasier to make a corset than to make a modern lined garment....So I will continue with the lining tomorrow and I continued to assembly the corset instead.

19:07 Corset is ready for boning! Yay! I will try to put in all the spring steel tomorrow and cut the crinoline steel. I need to buy tipping fluid when I go to town tomorowr afternoon. I also need to buy 4 m of black satin bias binding and find some hat decorations. I don't have high hopes for the latter, Uppsala is not a good town for costumers, but you newer know... Here is a picture of the unboned corset on vermont.


I have also pinned some bows and bells to the skirt. I'm not sure about the bells. I kind of think they look cute but maybe they just look silly? If i keep them (one at each quarter) I will also add one with a bow at the neckline CF on the corset.

So my shopping list for this outfit:
4m of satin bias binding
Tipping fluid
Gold net+Black feather?
Black fishnet stockings with back seam (I've found a pair here, I hope the IRL store has them too)

Now I'll snuggle in the couch with a warm wool blanket, a big cup of yogi tea and work on my striped petticoat while looking at The Duchess.

/L

Tuesday, December 1, 2009

A completely different era...

This is totally off topic for this blog since it's main focus is 18th century but this creation that are going to take form during the next couple of days is a costume, so it kind of fits a little bit.

I'm completely, utterly insane and this crazy idea kind of proves it. Yesterday me and Fantastic M, decided to go to Stockholm Burlesque on Saturday evening. Cool, great idea. But then the thought " I have nothing to wear" kind of ice skated through my mind.

I do have a burlesque outfit, this one, but the corset is getting a bit raggedy after heavy use and it is also a bit big on me. But the under skirt is still going strong and still fit. I also have a pattern for an 1880's OB corset that I've already made a mock up of and that only needs a minor alteration to fit. I also have in my stash somewhere a red flock printed taffeta with medallion motif.

With this in mind I went to work today in my sewing studio. I looked at my red taffeta but wasn't 100 % pleased.Then in the afternoon, inspiration hit me like a thunder bolt:

16:11 An idea is born... I suddenly realized that I had a fantastically, glittery fabric in my stash that I got wrapped around my birthday present this year...I hastily went through my stash,found it and pinned it to Vermont. It looked terrific so I quickly added some accessories to get a feel for it all. I also estimated how much new material I needed to buy. This is how it looked:


(The blue fabric that sticks out at the bottom is my 18th century under petticoat, it will not be in the finished costume)

Then I felt very accomplished and got back to work on the steam punk coat I'm making for a client.

18:16 My official work hours are finished and I start to transfer the changes from the mock up to the pattern.

18:29 Pattern is finished and I start to take out the corset pieces from the glittery fabric.

18:39 The cursing starts...there are not enough fabric for both a corset and a skirt! Arrrghh! Dives into the stash.

18:41 Found a skirt made of red metallic fabric. It needs a new waistband, shortening and some more ribbon decor added but otherwise its fine.


19:22 All the corset pieces are cut out from the fashion fabric and the seam allowances are covered with Fray Check. I leave them in the studio to dry and wanders into the main house, hungry and dizzy from the Fray Check fumes.

To be continued...

To clear all things up a bit.I have until Saturday evening to make my self a corset, add som ribbon decor and change the waistband on the skirt. I think can make it. The corset will have black piping in the seams and black ribbon on upper and lower edge. The skirt will have ribbons aded so it looks like I've made it in sections instead of a full cicle.I think it will look good when finished. I need to find myself some fun stay ups or hose, maybe fishnet ? Or classic ones with a back seam? What do you all think?

/L

Monday, November 30, 2009

Pet en l'air - Part five - fifth bodice fitting

I tried the new sleeve on last Friday and I think that I'll settle with this one. It's not perfect but it will have to do. I will cut the real fabrics with a bigger seam allowance so I can do some last minute fiddling with them.
This is what we got (boobs ahoy):

Front


Front with arm down


Back


In the pictures I have turned the hem and pinned my engagente to the sleeve instead of the chemise and it feels and looks much better. I'm still pondering if I should take out some of the fullness from the chemise sleeves. I like the little puff but it's not practical under the tight sleeve. And since I'm getting more and more into the look of 1780- to 90's the sleeves will get even more unforgiving for puffing chemises.

I hope I will manage to cut the lining and sleeve lining tomorrow. I'm starting to get a bit stressed about this outfit, I really want to have it finished in time for new years eve since we are goin to a really big fetish event.

/L

Wednesday, November 25, 2009

Done some shoppping

Today I was in Stockholm and did some shopping, my main reason for going was the fact that one big fabric store are closing this Sunday and they had 50% off on everything in the store. I was hoping to score some twill to use as corset linings for my corset line (my day job is a designer and producer of my own fetish brand) but all the twill had already gone. I'm not surprised, they started their sale a couple of weeks ago.
I did however score a perfect fabric for making myself a cute bum roll and it cost me only 15 SEK :)

I also visited Old Touch, a fabulous vintage store and got some very pretty embellishments. I finally ended my journey at IKEA and bought 2,85 m of the now infamous ANNELI fabric. Well, enough with boring text now and on with the pictures ;)


In the front we have a sturdy cotton fabric. It's a herringbone twill weawe and the stripes are also wowen. It's pure white and red, the light was not so good when I took the picture. In the background whe have ANNELI in black, I will use it as lining in the red velvet pierrot I have plans for.

Next are a couple of silk roses who need a little steam to get back in shape, they're a bit crusched from lying in a big pot in the store. I have not decied wich goes where yet but one or two of them will go on the wide brimmed straw hat that I've made as soon as I get it covered with fabric.


And last we have these ostrich plumes. There are two pink ones and one purple. I'm not so fond of the purple and the pink stuck together so I will take it a part and use them on different hats. The pink ones will probably end up on my tricorn and I think that the little jewelled buckle will serve as a front decoration on it.


I'm very pleased with todays haul. Over and out.

/L

Pet en l'air - Part four - fourth bodice fitting

You are not going to see any pictures from my third fitting, because that fitting was horrible and I deleted all the pictures out of pure anger. (Geesh, I really should work on my costumeing temper.)

Last Sunday I was at a "syjunta" (a swedish word that means " a sewing get togheter" held by Gustaf's Skål.
E, the writer behind Isiswardrobe, helped me fit my much hated sleeve and this is how it
looks now:


I'm almost there now, but I need to add 1,5 cm at the back of the sleeve because now it was too small for the armhole there, I think I'll add it at the sleeve seam. I think those 1,5 cm will make the sleeve large enough to fit comfortably over my chemise sleeve too. So hopefully, the next sleeve toile are the last one...

The poking at the front near the armhole is my stays that are protruding a bit, lovely boyfriend M accidentally laced me a bit too hard. It wasn't his fault my body quickly adopts to being laced so every time I do a fitting the gape in the back gets smaller and smaller...

I've also decided to baste my engagentes to the pet en l'air sleeves instead of my chemise because I think it will look and feel much better. Perhaps I should loose the cuff and puff on the chemise too?

/L

Wednesday, November 18, 2009

Pet en l'air - Part three - Second bodice fitting

I HATE SLEEVES!
There I said it. My bodice fit me fine without sleeves but when I put them in, they create havoc with the fit.
Now I need your help to figure out what to do. Lets start with some pictures of the misery, shall we?

Here you can see how the sleeves drag my shoulder straps of my shoulder.
And a closeup:


My thoughts goes as follows:
The overarm width feels OK, they are snug but not overly tight but I think I need to add at least 1,5 cm since muslin stretches and damask and stiff linen will not.
I think that I need to make the sleeve head higher, when I move it feels like the top of my shoulder doesn't have enough room to move around and drags the bodice down over my shoulder.
I don't know, maybe I should make the armhole a bit bigger in the front too? Or will that make my problem worse?

Oh, I really want this to fit so I can start with the fun part. I've already stitched together the back panels so as soon as the lining is finished I can just cut and work.

/L

Monday, November 16, 2009

Pet en l'air - Part two - Bodice fitting

Today during my tea break I stitched together the mock up for the bodice and the sleeves. I was skeptic to the sleeves the minute they were in. They looked like they might be too tight and the pleating was not nice at all. I also discovered that my tries to eliminate the need of darts in the shoulder strap area failed a bit, there was still a bit to much fabric there.
*le big sigh*
I know that a dart in that area is period, I've seen it in PoF but I really want to have a smooth inner bodice so there will be at least one more bodice mock up.
So this is how the bodice looks like on Vermont:

Front

Sleeve

Back

Tonight the Fantastic M, (my lovely boyfriend), helped me to lace up and then helped me to fit the back of the bodice. I have to take quite a bit away at the top CB. I think it's because my body mass are at the front while Vermont has his on his back ;)

Apart from the gap in the top CB, the bodice fit me fine. The sleeves did not. At all. The length was right but the width over my forearm was too tight. I need to add at least 3 cm there. I'm also playing with the idea to make the sleeve head rounded at the top not square because I think it will be easier to set in. I've seen both versions in PoF so I think it's safe.

Since it was so dark when we did the fitting on me, there are no pictures. But to comfort you here are piece of muslin that I've tested my pinking skills on. I think it looks nice and I will use this technique on the bottom frill for my petticoat. The strip is 23 cm wide and I marked both edges in 2,5 cm intervalls. Then I used those marks as guies for the pinking shapes when I cut with my shears.

The rounded shapes will be the head, I think.

The shopping finger is itching again...

I'm contemplating on buying these pair of shoes and redress them to look something like this:

(I found these pretties over at Fuschias blog)
Or maybe like those fabulous 1780's shoes that are in the end of 17th&18 th century fashion in detail *drool*

/L

Tuesday, November 10, 2009

Pet en l'air - Part one - Adventures in pattern draping

I've finally pulled myself together and started to work on my pet en l'air.
Today I made my first try ever at pattern draping. I'm used to do flat drafting but it is so darn hard with 18th century garments. So I decidedt o give it a go and damn it was fun and quick!

Please allow me to introduce to you my dress dummy, monsieur Valmont. He is a strange thing, it is like something between a man and a woman in body shape. But he has my measurements (although he has the most of his body mass in his back muscles and I have mine in my boobs). I'm going to make him a companion that are my exact body double but until I actually get around doing it, Valmont will have to stand being a cross dresser.

Anyway I put my stays on Valmont and tighten them to the measurements I know is comfortable for me. Then I pinned some muslin to the stays and started pinning, smoothing and pinning and drawing. Here are the result:

Front:


And back:


I made a slanted line at CB so I can make a lacing there. The first 4-5 cm will be stitched close and the rest will be open. I think I will put some synthetic whale bone around the opening to strengthen it a bit.

Tomorrow night I aim at taking the pieces of Valmont and clean up all lines and to make a full bodice mock up. If the bodice fits I can start on the sleeves.

/L

A queen bee?

I really have enough 18th century projects to work on already but I need to write this one down so I don't forget it.

I'm a bit in love with this cute fabric (a close up):


And a approximately 22x22" piece of the fabric:


It is a silk/rayon brocade and the bee are in dfferent nuances of gold from thaisilks.com

I want to make this pierrot from 1790:


Or perhaps this caraco from 1780 (with trim made of matching taffeta):


I think both will look really cute in that fabric.

/L

Monday, November 2, 2009

Trinkets for the Trinket box


This is a pair of earrings that I whipped together in ten minutes or so. I bought two pairs of earrings ,one pair had the bow part and one pair had the pearl drop. I cut the drops loose and put them on a new pair of hat pins that I attached to the bows.
I think they look cute and a bit Marie Antoinetteish. And they cost me only 50 SEK ( about 7$) since the earrings were on sale :D

In the background you can see a glimpse of my engagentes that are made of a very fine cotton lace. I attached them to my chemise sleeves with very big whip stitches so they are easy to take of if I need to.

/L

Thursday, October 29, 2009

Bad mood

Today is not a good day. I'm so angry at myself because I lost an ebay auction for the prettiest fan frame ever and I lost it with 4$. It feels so damn...evil. Why and why didn't I put in more money in the bid before I got to bed?

I really liked the frame because it was made of ebony with really pretty carvings and gilding, nice curvy shapes and everything. And it was big enough to pass for an 18th fan. And the frame was totally intact, no broken sticks. The only thing broken on the fan was the fabric.

I really hope another good frame will show up, because I really, really would like to make myself my own fan. I found a good 1770 fan that I can borrow some design elements from and settled on a color scheme and on the motifs. It's only the frame that's missing.

I've found another frame today on ebay but I don't know If there are any way to fix the two broken sticks on it:
Fan frame on ebay (it's the biggest one in the lot).

I feel so silly, I'm so upset over this that I feel like crying and that's ridiculous. To cry over a god damn fan :(

Sunday, October 25, 2009

Finished chemise & renovated stays

I've finally finished my chemise. It's completely hand sewn with linen thread and all seams are flat felled. It felt like this one took for ever with all those long seams and all the lace. It turned out a bit on the short side, I blame it on the fact that I cut the pieces one evening when I was very tired. But I'm over all pleased with my result anyway. I think it's awfully cute and I love wearing it, the linen is so soft to the skin. I really hope that the fabric store will have this wonderful linen in stock again next summer because I totally need one more of this comfy garment!
Here it is:

I was originally planning to buy a white silk ribbon for the neck but noow i think I will go for a pink one instead because it looks so cute :)

And here are the "after" pictures of my stays. We start off with the front:

The very shiny synthetic organza ribbons will leave and some white silk ribbons will take their place when they arrive. I think my cleavege looks much better now, but my next pair of stays needs some adjustment of the shape of the neckline. I think it's a bit to wide beacuse the shoulder straps land a bit to far out on the shoulder. I think a bit more narrow neckline will help me a bit with bust lift too.

And here are the side wiew:

Not much to say here, the side seam hit my sides perfectly. And the armhole feels good, no chafeing since I moved the end position of the horisontal bones.

And finally the back, and the horror:

I admit it, I'm vain when it comes to lacings, I want them to lay exactly parallell and be bone straight. But since I've gained som much...body wisdom...my stays can't to that on me any more. Here you can also see that my shoulder straps base need to move in a couple of centimeters, so the armhole will fit me better. I also think that the waist line is a bit low right now. If it moves up I think the stays will fit more comfortably in the waist area.

But these pair has an acceptable fit so they'll have to do until I feel like making me a new pair.

My next project on the loong to do list is to make myself a pair of engagentes and fix my shoes. I need two quick fix projects before I start to wrestle with fitting my pet en l'air.

/L

Sunday, October 18, 2009

It's MINE!

It was a hard bidding fight, but I finally won the fabulous fabric for 450 SEK!
So now I got 9. 75 m (= 10.6 yards) of pink striped silk goodness!
The only caveat is the with of it, it's only 90 cm but I can make an "polonaised" anglaise with shorter over skirt. I've seen it done in both extant garments and in fashion plates from the time :P
Weee I really need to finish my blue outfit so I can start this one!

/L

Thursday, October 15, 2009

My shopping finger is itching....

Fantastic fabric
I'm so tempted...it has "striped anglaise with pulled up skirt" written all over it.
But it looks like it might be a dupion fabric which is not so good.
What to do, what to do ?

Update:
I'm going to ask the seller about the width and weight and see what he/she says. But almost 10 m of fabric for 250 SEK...its a great price.
I'm having crazy ideas of matching it with a black/white striped fabric and make that cutaway dress from the Marie Antoinette documentary I've been blabbing about before.
Like so:


And here is a (quick) sketch of the gown in question:
The idea is to use the black/white in the petticoat and main part of the bodice and the pink/purple in the top layer. At the back it will have two buttons for looping up the skirt. I have not decided if I should go with 3/4 sleeves or long sleeves yet.

Another Update:
Spoke with the seller and the fabric is only 90 cm wide and it's striped horizontally and not vertical. That means that if I want to have the stripe vertical I must cut it on the width grain and not the length grain. That's OK with me, it's the lining of the garment that takes the strain but 90 cm is not long enough to get a over skirt that reaches too the floor and with a train as I had planned for my anglaise :/
But I have deciced to buy the fabric anyway :D

I will either make a real polonaise jacket like the one in Cut of womens clothing ormaybe make the 1770's "polonaise" in Kvinnligt mode or maybe a striped short jacket (also from Kvinnligt mode) with a peplum and matching petticoat with ruffle.
/L

Thursday, October 1, 2009

Distractions

My stays are done and the day before yesterday I started flat felling the long gore seams on my chemise. But yesterday nothing got done because of this lovely fellow:

His name is Akilles and he's a 1,5 year old Rottweiler. He is going to live with us for a little over a week as a try out period and if everything goes well, he'll be a new family member.
Right now it feels like we've been invaded by a 50 kg tornado with a huge heart that loves everyone. He even cries when the cats don't want to play with him...

Tonight I have to work with my chemise. It must be in a wearable state on Sunday because I'm going to participate in a 18th century salon arranged by Gustaf Skål. The very awesome Isis Wardrobe has promised to lend me an outfit. I will bring my stays, pocket hoops and the chemise.

This weekend there is also a 18th century lecture weekend that I'm going to participate in. I will take classes is 18th century beatuy, a madames wardrobe and 18th century cooking.

Now my tea break is over, I better get back to work.

/L

Tuesday, September 22, 2009

Trims, accessories and bargains

My stays are finished but the batteries in the camera was out (they are in the charger now) so the pictures of it whith me in it will have to wait until tomorrow.
While waiting for the batteries I would like to share some ideas with you, we'll start with the trims:

On the top is a silver metallic braid that I intend to use on the edges of my cuffs. I bought it on ebay mostly because it is very similiar in the design with one braid that was on a 1750 stomacher in the FASHION book.
Now my pet en l'air will be of a later date so I'm thinking of making a narrow version of this kind of trim (the bottom one) out of the plain taffeta I got instead, but I haven't made up mind yet:

The picture is borrowed from Art, beauty and well ordered chaos and her tutorial for making different kind of ruching.

In the middle of the top picture is the lace I'm going to use in the neckline of my shift. It's 100 % Cotton and slightly cream colored. I got it on my last job, when I made the orders for the factory I was allowed to order some for myself too. So I got 25 meters of it ;)

And at the bottom we have another ebay find. It's 100% Cotton and cream colored and I love the flower and bow motif. I will use it for my engagentes, in double layers and heavyly gathered. (I have 10 yards of it so I can splurge ;) )

While swearing over my stays, I have had plenty of time to ponder about acessories. My biggest issue was what to wear around my neck. Simple strings of pearls are not my thing so I decided to go with the silk ribbon in a bow with a charm option. I've reserached a bit and the most common version of ths is to wear a cross. I'm a pagan and out of respect for those who are christians I will not wear their religiuos symbol as an fashion acessorie, now matter how period correct it happens to be. I found this pendant in a flea market about month ago and I've decided to use it:


I think it's made of silver because it was covered in those blackish smears that unpolished silver has. I paid 5 SEK (under 1$) for it! I like the peacock motif and think it's suiting since this we'll be one of the most decorated outfits I've ever made. I willl try to get a rather wide ribbon so I can tie a big bow like this one:


I've also decided to try to make myself some new earrings. I''ve found a place that sells real pearl drops so I will go for those with a silver bow accent.

Then we ave arrived to the most fun part. HATS!
I will make two,one tricorn and one wide brimmed. I love the tricorns but I also know that they are not so very historic accurate for all occasions, hence the need to make a wide brimmed one too.

The tricorn will be covered with light blue velvet or light blue silk taffeta. The trim will follow my pet en l'air so it will be silver or ruched taffeta. It will have a sash round the crown made of white thin silk adorn with the metallic buckle that I bought earlier.I'm planning to buy some very pink feathers and a white silk rose to top it of.

The wide brimmed one will probaly be covered with some black silk (note to self, need to buy it). It will have a white sash or maybe a wide pink silk ribbon and the same kind of buckle that my tricorn has. And a plume made of ostritch feathers. BTW for my swedish readers, I found this site while searching for feathers and it looks like a cheap and promising source...

I've also been thinking about a fan but I'm not done planning this one yet so I can't share so much about it.

To top this superlong post of, here are pictures of too great bargains I've made:

This is a trinket box that I found on Tradera (a swedish auction site). It needs a new lining, the old one is ripped, but I liked the design on the lid so much so I decided to buy it anyway.


This is 60 spools of silk sewing thread. Some of them are full and some of them are only half but for a beginner embroiderer as myself, it is a gold mine! I got all this silk, a pair of very cute embroidery scissors and a package of needles for 185 SEK with shipping. (It's about 26$). It's a steal considering that one roll of sewing silk thread costs me 15 SEK at my other supplier. And I get the cute containers that the spools are living in too :D
I bought this stuff here (sorry only in Swedish):
http://textilaterbruket.iqdesign.se/

Now I'm going to drink some tea and start sewing on my chemise.

/L

Sunday, September 13, 2009

18th century coat/waistcoat pocket tutorial

There are many great tutorials out there that I've had great use of so now its my time to give something back to the costume community. Bear with my though, this is my first sewing tutorial ever written in English.

I learned this method of putting in pockets during my "practical vocational training" at the costume department at Borås City theater. They had learned the technique on a costume class for Lena Dhalström, a costumer that works for Drottningholms Slottsteater. (I've had "practical vocational training" there too and Lena really knows her stuff, I learned so much during the months I spent there).

Any way on to the tutorial:

  1. Mark the position of the pocket flap and the pocket hole:


  2. Cut out one pocket bag, it should be the length of your hand measured from the bottom of the hole x 2 + 2-3 cm. Cut one piece of your outer fabric thats about 2-3 cm wider that your pocket hole:


  3. Stitch the fabric piece on to the pocket bag in such position that it will fit over the pocket hole. You must have the pocket bag sticking out a couple of centimeters over your marking for the pocket flap.


  4. Put your pocket bag and your coat/waistcoat right sides together, mark the shape of your pocket hole on the back side of the pocket pag and stitch through all the layers around the outline. Cut ut your hole and leave 2,5 mm edge.


  5. Turn your bag into the hole and press it flat. The 2,5 mm edge you left will help you form a neat frame around your hole. "Dot stitch" (for swedish readers prickstygn) around the edge to keep everything in place :
  6. Take your bag and fold it so that at least 2 cm are sticking out over the flap marking (on the backside). Press and pin so it stays there. Place your pocket flap right side down and the point upwards, with the seamline on top of the marking and stitch it on though both layers. Fold you flap down and stitch down your lining with small stitches to hide the seam allowance . Press and voila you have installed a pocket!

    Here are some pictures of a finished one:


    Front flap closed


    Front flap open (You can see the 2,5 mm frame I was talking about earlier if you look at the upper edge of the hole)


    Back, the top line is the stitch that's holding both the bag and the flap.